


Like most folks, I enjoy a cup of coffee in the morning to get me on my feet for the days activities.
I am no coffee connoisseur, I just pick any old brand of coffee that is on sale and run it through my Keurig. A little cream and sugar and I am happy.
When my bosses at the brewery brought up the idea of making a coffee beer I said that I like the idea but I know nothing about coffee. I drink it and I have made coffee beers at other breweries, but the coffee variety and methods were long put into place before my arrival. I found myself in a spot where I needed to learn about coffee real quick.
After completing our task and producing our coffee beer I was left with pages of notes that would be perfect to put together for an article to share with other brewers. I hope that this information helps you understand coffee and allows you to design and produce the finest of coffee beers.
WHAT IS COFFEE?
We all (think we) know what coffee is. Most of us drink it every day, but few really know and understand that plant. The plant grows in warm tropical regions near the equator between 25 degrees North and 30 degrees South. It is cultivated all over the world, and is mainly grown for its orange to reddish berries and its seeds which are roasted to make the beverage we all know and enjoy. We are use to saying “coffee beans” however they are actually seeds. Because the majority of the population refers to them as beans and not seeds, I will too for the ease of this article. The classification of coffee is as follows: Kingdom: Plantae, Phylum: Angiosperma, Class: Asteridae, Order: Gentianales, Family: Rubiaceae, Genus: Coffea, Species: (there are a dozen varieties however only 2 are used for drinking production) Arabica (most all desired coffee) and Canephora (aka Robuta), Variety: Many with similar genetic properties. With coffee we are focused on choosing from the species and varieties which will be discussed shortly.
HISTORY & VARIETIES
Coffee originated near the Great Rift Valley in South West Ethiopia in Africa. There were only a few varieties that grew in the wild and over time the people of that area started to cultivate their favorite varieties for home use. From Ethiopia the coffee plant was taken to Yemen to be cultivated, then the Dutch took it from Yemen to Java. From Java the Dutch government decided to take the coffee plant to Europe and give it to the king of France. The King had the coffee grown in a greenhouse and named that variety “The Noble Tree”, which is the genetic parent of most coffee found today. While today there are over 1,000 varieties of coffee that grow naturally in Ethiopia the majority of coffee found in the world was taken or cultivated from “The Noble Tree.” Originally professional coffee growers would inspect and classify each variety of coffee based on the internodal distance (short or long), size and height of the plant, shape of the leaves, color of the plant, and color of the berries. Some plants are small and bushy while others are tall and skinny. The fruit on the seeds can range from a pale orange to a deep red depending on variety.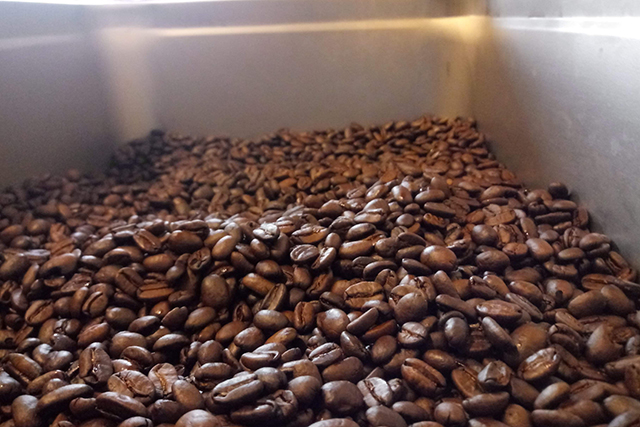
These coffee plants that were taken from “The Noble Tree” and cultivated around the world outside of Ethiopia are called and referred to as “Typica,” which is Latin for “ordinary.” This was the start of worldwide coffee cultivation and the beginning creation of selected varieties, which had a major impact on quality from the location, soil, and climate. These variety names often were named after the location or from the native language describing the plant. Up to this point the Arabica species was favored due to the superior quality over the Canephora species. This was until the 1940s when a naturally-found hybrid of both species, the only one ever found in nature, was discovered. This hybrid was found to have had a disease resistance to coffees arch enemy, “Rust.” This was a big break though in cultivation practices, however the plant still had some flavor issues that were not found in the Arabica species. Naturally, growers continued to make new hybrids trying to find the perfect match.
In the 1950s growers were able to narrow in their cultivation practices and create respectable hybrids of the flavorful Arabica and Rust disease resistant Canephora species. Many of these varieties still exist today such as Columbia (Columbia), Mocha (Yemen), Kona (Hawaii), and Bergundal (Indonesia). Now that growers had a handle on creating smooth, delicious, disease-resistant coffee plants it was a race to see who could come up with the best varieties. Just as we are seeing today in the hop industry with new varieties and cross breeds grown in different locations all over the world, to name and go over all the varieties or favorites would be an article all on its own. This is where I say go out to your local coffee shop or coffee roaster and see what is available. Try several side-by-side tastings and get an idea on your favorite variety as well as different roast levels. If you are not a coffee expert then ask your coffee shop owner for some direction on what you may be interested in. They are usually more than happy to talk about their craft with you and guide you in the right direction. Everybody’s tastes are different, so tasting and experiencing the coffee for yourself is your best option.
CAFFEINE AND DECAF
Caffeine does not dissipate much during the roasting process so the level of roast does not matter in that context. What you do see is that the more you roast the coffee the finer the coffee becomes when you grind it. This means that you can fit more coffee into the same sized brewing container when brewing, giving you more caffeine. Depending on the variety of coffee you can expect to get 85 to 100 mg of caffeine per cup, or eight ounces, of coffee. Caffeine intoxication, or “the jitters”, occurs around 300 mg and the half life is around 4.9 hours. This should help with dosing in your beer or for regular coffee consumption. Decaffeinated coffee, or “decaf”, is not caffeine free. Most decaffeinated coffee will fall in the range of 8.6-13.9 mg per cup. To be considered caffeine free by the FDA 97% of the caffeine must be removed. Depending on the variety of coffee will greatly change the caffeine dosage per cup.
There are three ways that are used today to create decaffeinated coffee: with the use of chemicals; carbon filters; or CO2 extraction. Originally sailors noticed that the caffeine content in coffee would lessen during their coffee as they traveled across the sea, which they attributed to the salt in the air from the oceans. After some trial and error they finally reached the three common methods used today.
- CHEMICAL EXTRACTION: After realizing that using Benzine wasn’t the best option for obvious reasons, they switched to using Dichloromethane or Ethyl Acetate which can naturally be found in fruits. The coffee beans would be soaked in water to open the pores and dissolve the caffeine and flavors into the liquid. Next the liquid is separated from the beans, then by adding one of these chemicals then letting it soak for about 10 hours while the caffeine separates from the flavors. The liquid would be heated to evaporate the solvent from the solution, then the liquid full of flavor would be added back to the beans to soak before evaporating the liquid. Because these chemicals come from a natural source you often find on the package “Naturally Decaffeinated”
- CARBON FILTERED: Hot reverse osmosis water is added to the coffee beans to draw out the caffeine, the liquid is charcoal filtered then added back to the beans to soak and later be evaporated.
- LIQUID CO2 EXTRACTION: The coffee is added to an extraction vessel with water where close to 1,000 psi of CO2 is added to draw out the caffeine before evaporating the liquid.
SERVING STYLES
You can go into any coffee shop and stand back for a minute while you figure out all the different ways to drink coffee. Half of these methods I can’t even pronounce. Out of all the ways to enjoy your cup of coffee, I will explain some of the common favorites that I have come across. By understanding the different ways and styles to experience a cup coffee will give you a target on how you want to target your flavor in your final beer. For me this was in interesting part of the process, especially for and average coffee drinker.
- BLACK: This is straight-up coffee brewed with hot water around 195°F-205°F for optimal extraction, and is as basic as it gets. I enjoyed this version of coffee because it gives you an idea of what to expect from the character of the coffee variety without any extras. You can evaluate the bitterness, acidity, roast, and flavor of the coffee.
- SUGAR OR CREAM & SUGAR: For me, and a majority of coffee drinkers out there, this is our go to standard in the morning. Sugar will cut down the bitterness (same with the relationship between the sugars derived from malts and the bitterness from hops), and the milk adds a creamy smooth flavor that usually compliments the bold coffee flavor.
- ESPRESSO: The word espresso means “fast.” Coffee brewers wanted to find a way to make coffee quickly and came up with an espresso shot. They would add ground coffee with hot water and quickly press it out for a rich coffee shot.
- MACCHIATO: Italian for “staining coffee,” which is done with a little bit of milk cream and froth to reach a golden color.
- LATTE: This is coffee that is served with roughly a finger width of cream or milk which is more than a Macchiato.
- CAPPUCCINO: This is 30 percent coffee, 30 percent milk or cream, and 40 percent froth. Cappuccinos have more milk or cream than a Latte
- FLAT WHITE: Originated from the Flat White location of Australia. This is smaller serving size than a Latte with the same about of coffee but has less milk or cream.
- COLD BREW: Cold brews are coffee that has been coarsely ground and allowed to steep at cold temperatures around 34F to 36F for 16 to 20 hours, then pressed or strained off the coffee grounds into a separate container to serve. This provides a smooth rich coffee flavor with less acidity.
- NITRO COLD BREW: This is a cold brew that is served on nitrogen just like you might a Dry Irish Stout. This adds a silky character to the mouthfeel.
COFFEE ROAST LEVELS
Roasting coffee is definitely an art form. Each coffee variety, size of the bean, moisture content, method of roasting (direct fire pan roasting, oven, hot air roasting), temperature, and speed will all result in a different roast. The roast levels and temperatures given below are just a guideline as each roaster will have different techniques. Once you have picked out your favorite coffee variety from your favorite location you must choose your roast level. Remember, when picking a roast you must keep in mind the target flavor of your final beer and how well it pairs with your recipe.
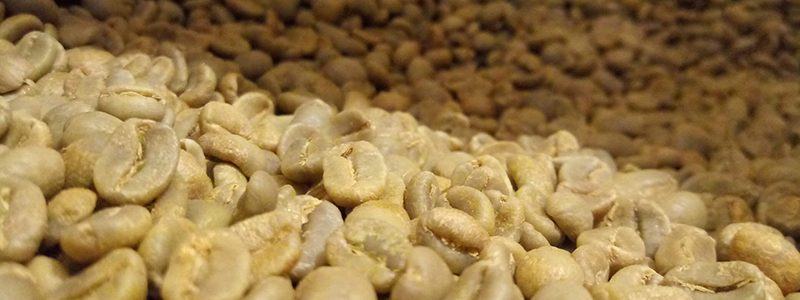
- Room temperature/ Raw green coffee: Nutty, pea or bell pepper character
- ~385F – “1st Crack” / Cinnamon Roast: Very light, sweetness in under developed, toasted grain and grassy character. Sharp acidity.
- ~401F / New England Roast: Light brown, highlights the original coffee character with complex acid levels
- ~410F / American or Blonde Roast: Medium light brown, acidity slightly mellowed but original coffee character still present.
- ~426F – Mid “1st Crack / City Roast: Medium brown, original coffee character with noticeable roast character
- ~437F – End 1st Crack / Full City Roast: Medium dark brown roast is prominent.
- ~442F / Full City + Roast: Between 1st & 2nd crack, medium acidity, medium to strong aroma, medium to strong sweetness.
- ~446F – Start 2nd Crack / Vienna or Full City ++ Roast: Medium dark brown, light oils on the surface of the bean, more bitter and sweet, carmel notes with low acidity.
- ~464F / French Roast: Dark brown, shiny oils on the bean, burnt character, with low acidity. More roast than original coffee variety character.
- ~473F / Italian Roast: Black, burnt character with very low acidity.
- ~486F / Spanish Roast: Fully carbonized, charred bean.
- ~497+F: Product is destroyed and likely to catch on fire.
BASE BEER DESIGN
The most common beer styles to use coffee in are often Porters and Stouts, however you can use any style. The key to making a great coffee beer is to find a way to showcase the coffee then build the recipe to support that character. No matter what style you choose whether it be a Porter, Stout, RIS, Brown Ale or Blonde Ale you must design your base recipe to compensate or all the characters of that variety of coffee. Is the coffee bitter, acidic, citrus, lime, nutty, fruity, or chocolaty, just to name a few? After taste testing your coffee variety you will have an idea on what to expect and how to pair it with your chosen style. For our brewery, we chose a Sumatra (Indonesian) coffee, and a mild Vienna roast to provide less bitterness with less acidity to use to make a Coffee and Cream Stout.
I know some brewers may not want to hear this this next statement, but it is very beneficial knowing your water report and what you have to work with, especially when brewing styles that use dark acidic malts. You really want to watch the mash pH and make sure that you are preventing too much, or any, acidity coming from the malts. We have fairly soft water with a RA of 90, so we opted to add our dark malts into the mash during vorlauf. This would prevent the base beer from being to acidic before we added the coffee. We felt that it was the right approach and the results backed that up.
Just with any beer recipe you need a balance of sweetness from the sugars created by the malts and the bitterness from hops. The only difference with a coffee recipe is that you now have to consider the character (flavor, bitterness, and acidity) of the coffee that will used in the recipe, then adjust for it. For the sugars you have a few options. You can mash at a higher temperature to create more dextrins and unfermentable sugars, use a lower attenuating yeast strain which will leave more sugars unfermented, use higher amounts of crystal malts, or use lactose. For our recipe we chose to use lactose to provide that extra sweetness and creaminess that fit well with our “Coffee & Cream” theme.
Depending on the base style and your target outcome, the hops and IBU will vary. We wanted to showcase the coffee and only wanted to balance the beer without much hop presence. We decided to use Magnum which is a basic bittering hop and targeted 50 IBU for the 7.0% ABV stout which worked just fine. There are many ways to tackle the hop vs sweetness but it all depends on the base style and your target outcome of the beer. The recipe is the base foundation to showcase your choice of coffee and roast.
WHAT METHOD TO ADD THE COFFEE TO THE BEER
- HOT SIDE OR COLD SIDE: While some brewers may have had success adding coffee to the hot side of the process I would advise against it due to the astringent and acidity that might come from letting the coffee sit at boiling or near boiling temperatures for too long. I would suggest adding the coffee to the cold side of the brewing process.
- WHOLE OR GROUND BEANS?: Due to the overall mess, getting coffee grounds in your beer, filter issues (if you filter), and consistency concerns I would suggest using whole beans. It’s just much easier. With homebrewing the task of adding coffee to a beer is much easier than doing it commercially. I have had great results by brewing a pot of coffee and tossing it into the keg or bottling bucket before racking beer into it and packaging; brewing a pot of coffee then using that coffee to run it through the coffee maker again making a double brewed coffee before adding to packaging; making a cold brew before adding it to packaging; making a cold brew with beer before adding it to coffee; making espresso and adding it before packaging; and by simply adding the coffee in a cheese cloth to put inside a keg or even the fermentor, or secondary if that is your practice. Experimentation with several methods will allow you to find your favorite choice. My favorite choice is to either add the cheese cloths full of whole beans to the secondary fermenter, or by making a cold brew using beer.
*At a brewery I one worked at, we all sat around for a day all French Pressing 4 minutes each time coffee to make espresso to fill up 2 half barrel kegs to dose into roughly 100 barrels of beer. The espresso not only stained our hands but the caffeine absorbed into our skin and we were all zipping around with eye twitches and unsteady shaky hands. Halfway through we decided to wear gloves as we could not handle much more caffeine. This is one of my favorite coffee beer stories.
PACKAGING
Here I am mainly focusing on carbonation volumes. Whether you are priming with sugar, wort, or force carbonation, the level of CO2 will make a difference in how you perceive the beer. Usually the carbonation volumes for coffee beers favor the lower side around 2.60 versus 2.64-2.70 for other beers. This allows less carbonic acid from the CO2 to saturate a beer that is likely to already be high in acid from dark malts (if used) and the coffee itself. This is why you often find coffee beers served on Nitro (nitrogen). This lowered the acidity and adds a smooth creaminess to a beer. To do this I carbonate the beer to about 2.20 volumes of CO2 then apply nitrogen to the beer for several days. It is okay to use the “Bev-Gas” mix of 25 percent CO2 & 75 percent nitrogen for this. The other option is to carbonate the beer to your desired volumes and simply push with the Bev-Gas mix. The fun part is doing all of these methods and doing side-by-side tastings and seeing the difference. There is no right or wrong way to do this, as it all depends on your target perception of the beer.
CONCLUSION
The topic of coffee is a very in-depth one that could easily take an entire book to discuss. When adding it to beer it makes the topic that much more complicated. I tried to compose the best of my notes to give a solid base guideline on how to produce the best coffee beer possible using several methods, however, your best option is to go out there and experience coffee for yourself. Let all of your senses be your guide on this journey, and apply them to your brewing knowledge.
OUR ROASTING EXPERIENCE WITH BRUCE AGUILAR FROM SHERMAN’S VALLEY COFFEE COMPANY IN NEW BLOOMFIELD, PENNSYLVANIA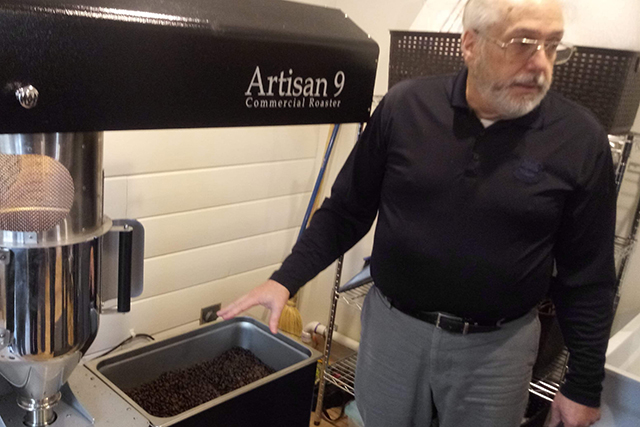
VIENNA ROAST PROCESS: Sumatra Lintons Coffee Beans
- Fill the roaster with four pounds of green coffee.
- Turn heat on a 8:24 a.m.
- ~375F You can expect one rebel bean to pop.
- At 273.2F the beans are still green with a grassy bread aroma.
- 8:28 a.m. – About done the drying phase. At this point the outer skin of the coffee bean comes off. Notices a grassy/bread aroma.
- 8:30 a.m. – (Roasting temperature 630F) Coffee temperature 346F: The green coffee will start to change color and become a unique rare “Cinnamon Roast” which is fairly acidic. Peanut aroma right before first crack.
- 8:31 a.m. – 395F: First crack, then lots of popping. Very quick. At this stage the beans are developing simple sugars. At this point forward you can stop the roasting process to get the level of roast and character that you want. Roasts: Cinnamon, Vienna, French, Italian, then it will burst into flames.
- 8:33 a.m. – 450F: More pronounced nutty aroma, Noticeably starting to change colors to a brown as well as the coffee is starting to smoke.
- 8:33 a.m. – 456.7F
- 8:34 a.m. – Second Crack starts. You can hear the quick sizzingling of the beans.
- 8:35 a.m. – 465F: With careful attention to detail Bruce knew the perfect time to quickly dump the coffee into its holding/cooling bin. Here the bin sucks air down, as to not make a mess, through the beans to vent. Longer resting will produce more oils. (TOTAL TIME: 11 MINUTES)
- Beans double in size and are very brittle.
- Roasted beans are crispy, potato chip style crunch and easy to eat. Mild roast that is not acidic.
- Sumatra Lintons Coffee Roasting Process: Final Temperature 465.0°F, Vienna Roast. Oils come out of the bean.
1 Trackback / Pingback